
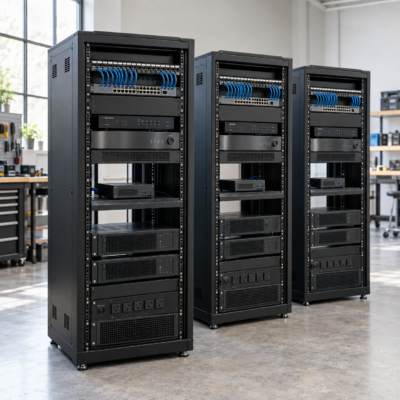
For integrators who design equipment racks from scratch, standardizing rack architecture can be one of the fastest operational and cost savings improvements a firm can make. A proven layout, a complete parts list, and consistent assembly practices give the installation team a better starting point on the next job.
Lowell racks and accessories provide useful building blocks for standardization. The opportunity comes from turning racks and supporting accessories into repeatable systems that your team knows how to quote, build, test, and service.
The following article explores rack standardization through the lens of audio-visual integrators. Whether you’re standardizing on knockdown racks, gangable racks, enclosed racks, or designer racks, Lowell and Future Ready Solutions are here to help engineer your next project.
>
Understand where rack variability consumes margin
The purchase price and shipping cost of a rack captures only part of its cost to the integrator. The delivered cost also includes design, purchasing, assembly, wiring, commissioning, and the labor required to support the installation.
When those activities vary unnecessarily from project to project, estimating becomes harder. One technician organizes cables differently from another. A familiar accessory gets replaced with a part that requires different mounting hardware. Equipment ends up in a location that makes the next connection difficult to reach.
A standard architecture resolves routine decisions before work begins. It defines the rack lines the company uses, the accessories that belong with them, and the practices that guide equipment placement, cable routing, labeling, and testing.
That also gives the estimator a more useful reference. Actual labor from a previous build can inform the next proposal when the configuration and assembly process are comparable. Over time, the company can price familiar rack packages using its own known and measured results.
>
Start with proven rack designs
Choose the applications your team encounters most often and build a template for each. Three starting points can cover compact AV systems, larger floor-standing installations, and wall-mounted AV or network equipment.
>
| Typical application | Lowell starting point | What the design template should include |
|---|---|---|
| Compact AV or control system | LXR Series slim, open-frame rack. | Equipment fit, shelf package, cabinet ventilation, cable entry, and access for service. |
| Floor-standing AV installation | LER Series enclosed rack. | Rack size and depth, rail positions, power distribution, cable pathways, and rear access. |
| Wall-mounted AV or network installation | LWR Series swing-open rack. | Wall support, equipment weight and depth, swing clearance, and cable movement. |
>
The LXR Series is a practical example for space-constrained applications. Options include 8U, 14U, 22U, and 30U models at 21 inches deep. Its slim, open-frame design will support a repeatable approach to racks installed in suitable cabinetry, closets, or credenzas.
For enclosed floor-standing installations, the LER Series provides a different foundation, with welded construction and adjustable mounting rails. The LWR Series addresses wall-mounted applications with a front mounting section that swings away from its backbox to provide access to equipment and connections.
Each rack design template still needs a project-specific fit check. Confirm usable depth, connector clearance, equipment weight, mounting requirements, and service access before approving the configuration. And, of course, define when a project requires an alternate rack or a custom design. Future Ready Solutions and Lowell offer thousands of other racks and configurations with the popular solutions listed on the Lowell Racks & Enclosures page.
>
Don’t forget the accessories
A repeatable rack package needs a complete bill of materials. Shelves, cable supports, ventilation components, power distribution, and mounting hardware should appear in the quote and build documentation from the beginning.
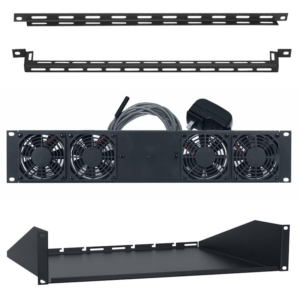 This is where the breadth of Lowell’s rack accessories becomes useful. An integrator can establish approved components for common tasks and carry those selections into purchasing and assembly.
- Equipment support. Select an appropriate shelf for each device that does not mount directly to the rack. Lowell utility shelves include solid and vented options. Document shelf depth, load requirements, device retention, and access to the device’s connections.
- Cable organization. Use approved cable management bars, panels, or other supports at defined locations. Lowell’s accessory range includes horizontal and vertical cable management. Pair the hardware with a consistent routing and labeling method.
- Thermal management. Define approved ventilation components for the equipment and enclosure. For example, Lowell’s BDC41T is a 1U blower-fan panel with temperature-controlled operation that exhausts through its front vents. Its suitability depends on the planned airflow path.
- Power distribution. Select a Lowell rack power strip with the required outlet configuration and electrical rating, then document its placement and connected loads. Specify any required battery backup or remote power control separately.
Small items belong in the package too. Include the correct screws, cable fasteners, labels, and mounting accessories so the technician can start with a complete kit. Check accessory compatibility for the selected rack and keep approved substitutions in the parts list.
The purchasing benefit is practical: a reviewed package gives the buyer a clear list to order and the shop a clear list to verify. It also makes a missing component easier to identify before the installation date.
>
Make the build repeatable from the shop to the service call
A rack elevation shows where equipment belongs. A standardized template goes further by showing how the completed rack should be assembled and verified.
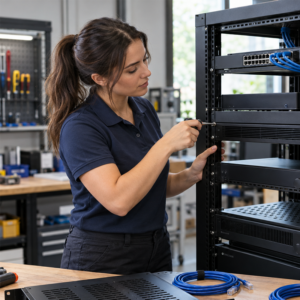 Include front and rear reference photographs, cable routes, label formats, power connections, and a commissioning checklist. Document where service slack belongs and how a technician can remove a device without dismantling unrelated wiring.
For suitable projects, assemble and test as much as practical in the shop. Familiar layouts make it easier to prepare the required parts, verify connections, and identify access problems before the rack reaches the site. Account for transport, lifting, mounting, and any work that must wait until installation.
Make sure to document and accurately count all of that effort. Moving four hours of work from the jobsite into the shop changes where the work happens; the margin benefit depends on reducing total effort, rework, travel, or disruption.
Consistent documentation also supports training and service. A technician can compare a new build with an approved example, and a service technician can use the same labeling and port-map conventions across multiple customers. Keeping those records current makes the installation easier for the whole team to support.
>
Build engineering checks into every template
The most useful standard tells the designer what to verify on every job. Rack dimensions, thermal requirements, and electrical demand can change even when the overall application looks familiar.
Equipment fit includes the space behind the chassis. Allow room for connectors, cable bends, power cords, and maintenance. Check support requirements for heavy equipment and the ratings that apply to the actual installation, including wall mounting or a mobile base when used.
Cooling requires an intentional path for intake and exhaust. Match the design to equipment airflow and the surrounding room or cabinetry. Choose blank panels, vent panels, and fans to support that path, and verify operation under representative load. A fan added to a closed cabinet does not by itself establish an adequate cooling design.
Cable routing needs the same discipline. Follow each cable manufacturer’s bend-radius and handling requirements, support cable weight, and avoid putting tension on connectors. A swing-open rack also needs enough managed slack to complete its service movement without pulling or pinching cables.
Finally, document electrical loads, outlet and plug requirements, and the intended power arrangement. Reserve space and capacity for the expected expansion of that particular system. These checks make the template useful across projects while keeping the final design appropriate for the equipment and site.
>
Translate saved labor into project margin
Consider a hypothetical fixed-price installation with $20,000 in revenue. Assume equipment and other direct costs total $12,000, and the project requires 40 labor-hours at a burdened direct labor cost of $75 per hour.
Now assume a standardized rack package reduces total project labor to 32 hours but adds $150 in shelves, cable management, or other accessories. The comparison looks like this:
>
| Project economics | Original approach | Standardized approach |
|---|---|---|
| Project revenue | $20,000 | $20,000 |
| Equipment and other direct costs | $12,000 | $12,150 |
| Direct labor | 40 hours × $75 = $3,000 | 32 hours × $75 = $2,400 |
| Total direct cost | $15,000 | $14,550 |
| Job gross profit | $5,000 | $5,450 |
| Job gross margin | 25.00% | 27.25% |
>
In this example, eight fewer labor-hours more than offset the added accessories. Calculated job gross profit increases by $450, and gross margin improves by 2.25 percentage points at the same selling price.
Note that these are illustrative assumptions — actual results depend on your template and labor force. Use your actual direct labor cost, including the labor burden your company assigns to projects, rather than your customer billing rate. Include preparation time, added parts, and the cost of developing and maintaining the templates when evaluating the program.
If payroll remains unchanged, the immediate business benefit may be recovered capacity. Converting that capacity into additional profit requires productive use of the time, such as completing more billable work or avoiding overtime. The pricing model matters too: fixed-price work and time-and-materials work capture efficiency differently.
>
Put the standard into everyday use
Start with the rack configuration your company installs most frequently. Bring the designer, estimator, lead installer, purchaser, and service technician into the review. Use a successful installation as the starting point and document the details that made it work.
- Create the package. Define the Lowell rack family, compatible accessories, rack elevation, cable and power plans, reference photographs, and acceptance checks.
- Make it easy to quote and order. Save the approved bill of materials in the estimating system, including necessary hardware and permitted substitutions.
- Pilot it on comparable projects. Record total design, preparation, installation, and commissioning labor, along with missing-part interruptions and rework.
- Revise it from actual results. Review service findings and technician feedback, assign an owner to the template, and update its revision when the design changes.
Compare similar projects when measuring progress. A larger equipment count or more difficult site conditions can explain additional hours even when the standard is working. Track enough detail to understand what changed.
The next rack should benefit from what the team learned on the last one. When those lessons are captured in the design, parts list, and build instructions, the company has a repeatable way to protect the labor allowance in its proposals.
Future Ready Solutions offers Lowell racks and accessories that integrators can use to develop these standard packages. Explore the Lowell product line and contact our team to discuss the rack, cable management, ventilation, and power components for your most common installations.